1. The "Glitch" in the Matrix
If you have ever tried to write a real-time audio monitor in Python, you have likely hit the dreaded "Input Overflow." You write a simple loop to read from a microphone, add some DSP to analyze the sound, and suddenly - pop, click, glitch - your audio stream corrupts.
The Problem: Standard scripts put too much pressure on the critical path. If your code pauses for even a millisecond to write a file, the hardware buffer overflows and data is lost.
2. Low Barrier to Entry
Traditionally, professional audio analysis is a walled garden requiring expensive proprietary hardware (FPGA/DSP chips). This project disrupts that paradigm by leveraging the power of modern Python.
Python Ecosystem
Accessible to millions of developers. Leverages the massive PyData ecosystem.
Commodity Hardware
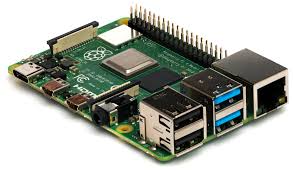
Runs on a standard Raspberry Pi ($35-50) or any Linux machine.
Open Standards
No proprietary data formats. Uses standard USB Audio Class drivers and universal WAV files.
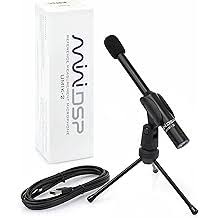
3. Hardware & Edge Computing
The system couples the MiniDSP UMIK-1 - a calibrated measurement microphone - with the Raspberry Pi 4. Using Numpy Vectorization, entire audio chunks are processed in single C-level operations.
While optimized for the UMIK-1, the software is highly extensible to any standard USB microphone. Full plug-and-play support for the high-resolution UMIK-2 is already on the roadmap.
4. Architecture: Producer-Consumer
To fix the glitch, I split the workload into two dedicated threads connected by a thread-safe Queue. This decouples the "Listening" (Hardware I/O) from the "Thinking" (Processing).

👂 The Producer
Interfaces with hardware via sounddevice. It pushes raw audio chunks into the queue immediately and performs zero processing.
🧠 The Consumer
Lives on the other side of the queue. It pulls data at its own pace to execute the AudioPipeline (FFT, LUFS, File I/O).
The Pipeline Pattern
Once the Consumer retrieves the data, it flows through a modular pipeline. This pattern allows multiple applications (like the Meter and Recorder) to run simultaneously from a single audio stream without blocking each other.

5. Distributed Topology (IoT)
While the threaded model solves local glitches, it is still bound to a single machine. To enable true Remote Monitoring, I introduced a Transport Layer abstraction using ZeroMQ.
Breaking the Monolith: By swapping the internal Memory Queue for a TCP Socket, the "Ear" (Producer) and the "Brain" (Consumer) can now run on completely different computers.

Runs on the Raspberry Pi. It captures audio and broadcasts it to the network blindly (Pub-Sub). It has no GUI and uses minimal CPU.
$ umik-real-time-meter --producer --zmq-port 5555Runs on your Laptop. It subscribes to the stream to visualize metrics or record data without burdening the Edge device.
$ umik-real-time-meter --consumer --zmq-host 192.168.1.X6. Process Isolation (The GIL Breaker)
Even with threads, a standard Python application is limited by the Global Interpreter Lock (GIL). If the visualization thread hangs for 50ms, the audio thread stalls, causing a glitch.
Moving to a distributed architecture provides not just network features, but OS-Level Reliability.
The Producer behaves as a System Daemon. Using the Unix nice command, it is assigned the highest possible CPU priority. The OS will pause everything else (including the Consumer) to ensure the microphone buffer never overflows.

The Producer (Red) bypasses the GIL and fights for CPU time independently of the GUI (Grey).
High Priority Mode (-20). Bypasses GIL.
sudo nice -n -20 umik-app --producerStandard Priority. Connects to stream.
umik-app --consumer7. The Code: Zero-Allocation Buffering
The secret to solving the "Input Overflow" isn't a complex algorithm - it's about flow control. By using put_nowait, the hardware thread never blocks waiting for the consumer. It acts as a shock absorber.
while not self._stop_event.is_set():
    # 1. Read from Hardware (Blocking)
    audio_chunk, overflow = stream.read(block_size)

    if overflow:
        logger.warning(f"Input overflow on device {device_id}")

    # 2. Push to Buffer (Non-blocking)
    # This ensures we never miss a hardware cycle
    self._queue.put_nowait((audio_chunk, timestamp))
8. Built-in CLI Tools
# Scans for audio hardware available on the host.
# Generates the FIR filter from the manufacturer's calibration file.
# Starts the live decibel in the terminal.
# Starts the high-fidelity recording service.
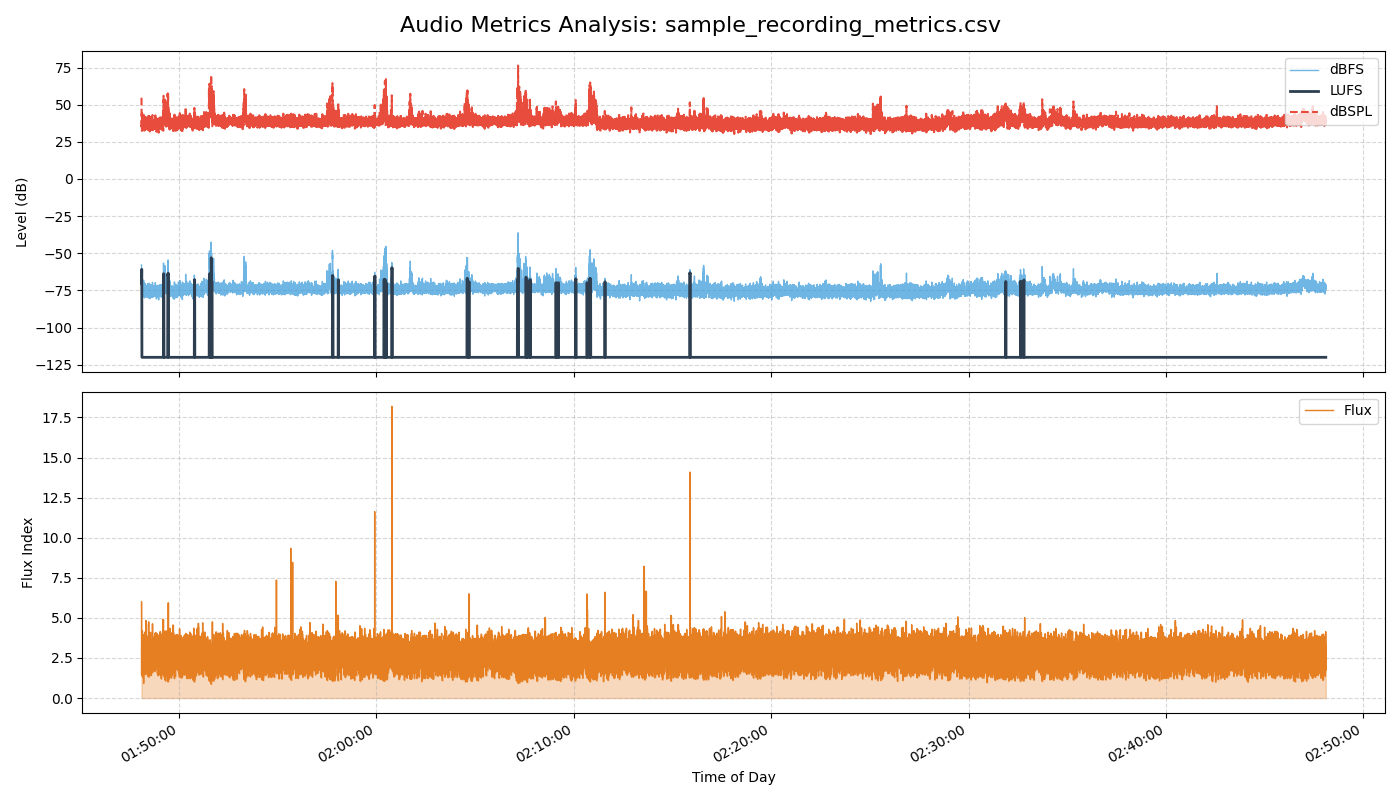
9. Forensic Audio Analysis
Beyond real-time monitoring, the suite includes offline analysis tools. These tools can ingest WAV files and generate detailed, frame-by-frame reports, allowing engineers to visualize invisible acoustic events.
Why Calibration Matters: dBFS vs. dBSPL
Most audio libraries only provide dBFS (Decibels Full Scale), which measures digital amplitude relative to clipping. It tells you nothing about real-world loudness.
By applying the UMIK-1 calibration file (FIR Filter), this application translates digital signals into dBSPL, allowing you to measure actual physical pressure in Pascals - crucial for noise compliance and acoustic engineering.
# Calculates psychoacoustic metrics (LUFS, Flux) from a recording.
# Renders the dual-axis forensic chart.
10. The Developer SDK
umik-base-app isn't just a set of scripts; it is a reusable Python Framework.
Developers can import the core classes to build custom audio applications - like a secure stream recorder, a baby monitor, or a clap detector - without writing a single line of low-level hardware or threading code.
What you get for free:
- ✓Process Isolation: Custom apps run safely as a Consumer.
- ✓Network Transport: Code works locally or over WiFi automatically.
- ✓Hardware Watchdog: Automatic reconnection if the USB cable is bumped.
"By inheriting from the AudioSink class, business logic is the focus, while the framework handles the physics of audio capture."
from umik_base_app import AudioSink

class LoudnessPrinter(AudioSink):
    """
    My custom logic: Prints if sound gets too loud.
    """
    def handle_audio(self, chunk, timestamp):
        # 1. Calculate RMS (Volume)
        rms = np.sqrt(np.mean(chunk**2))

        # 2. Trigger Business Logic
        if rms > 0.05:
            print(f"[{timestamp}] 📢 LOUD NOISE DETECTED!")

# ... Attach to pipeline and run!
11. Future Roadmap: Edge AI
The umik-base-app serves as the stable foundation for a more advanced initiative: the Edge AI Acoustic Monitoring project.
This extension integrates Machine Learning (via TensorFlow Lite and YamNet) directly onto the embedded device. Instead of just measuring loudness, it classifies what produced the sound - identifying events like 'Chainsaw', 'Glass Break', or 'Siren' in real-time.
Explore the AI Extension
View the source code for the Machine Learning implementation on GitHub.
Go to Repository12. Engineering Logs
I documented the entire development journey - from the initial architectural decisions to publishing the package on PyPI. Read the "Zero to Hero" series on GitHub: